
You will need:
- A Version Story account
- The Claude desktop app or claude.ai
There are two ways to set up — pick the one that applies. If your team has already added Version Story Compare in organization settings, open the organization path and skip to For each member.
Set up for an organization
Overview
An owner adds Version Story Compare once for the whole organization. After that, each member only has to connect their own Version Story account — no URLs to type and no capability settings to change.
For the organization owner
Add the connector
-
Open Organization settings and go to Connectors (under Libraries & Access).
-
Click Add → Custom → Web.
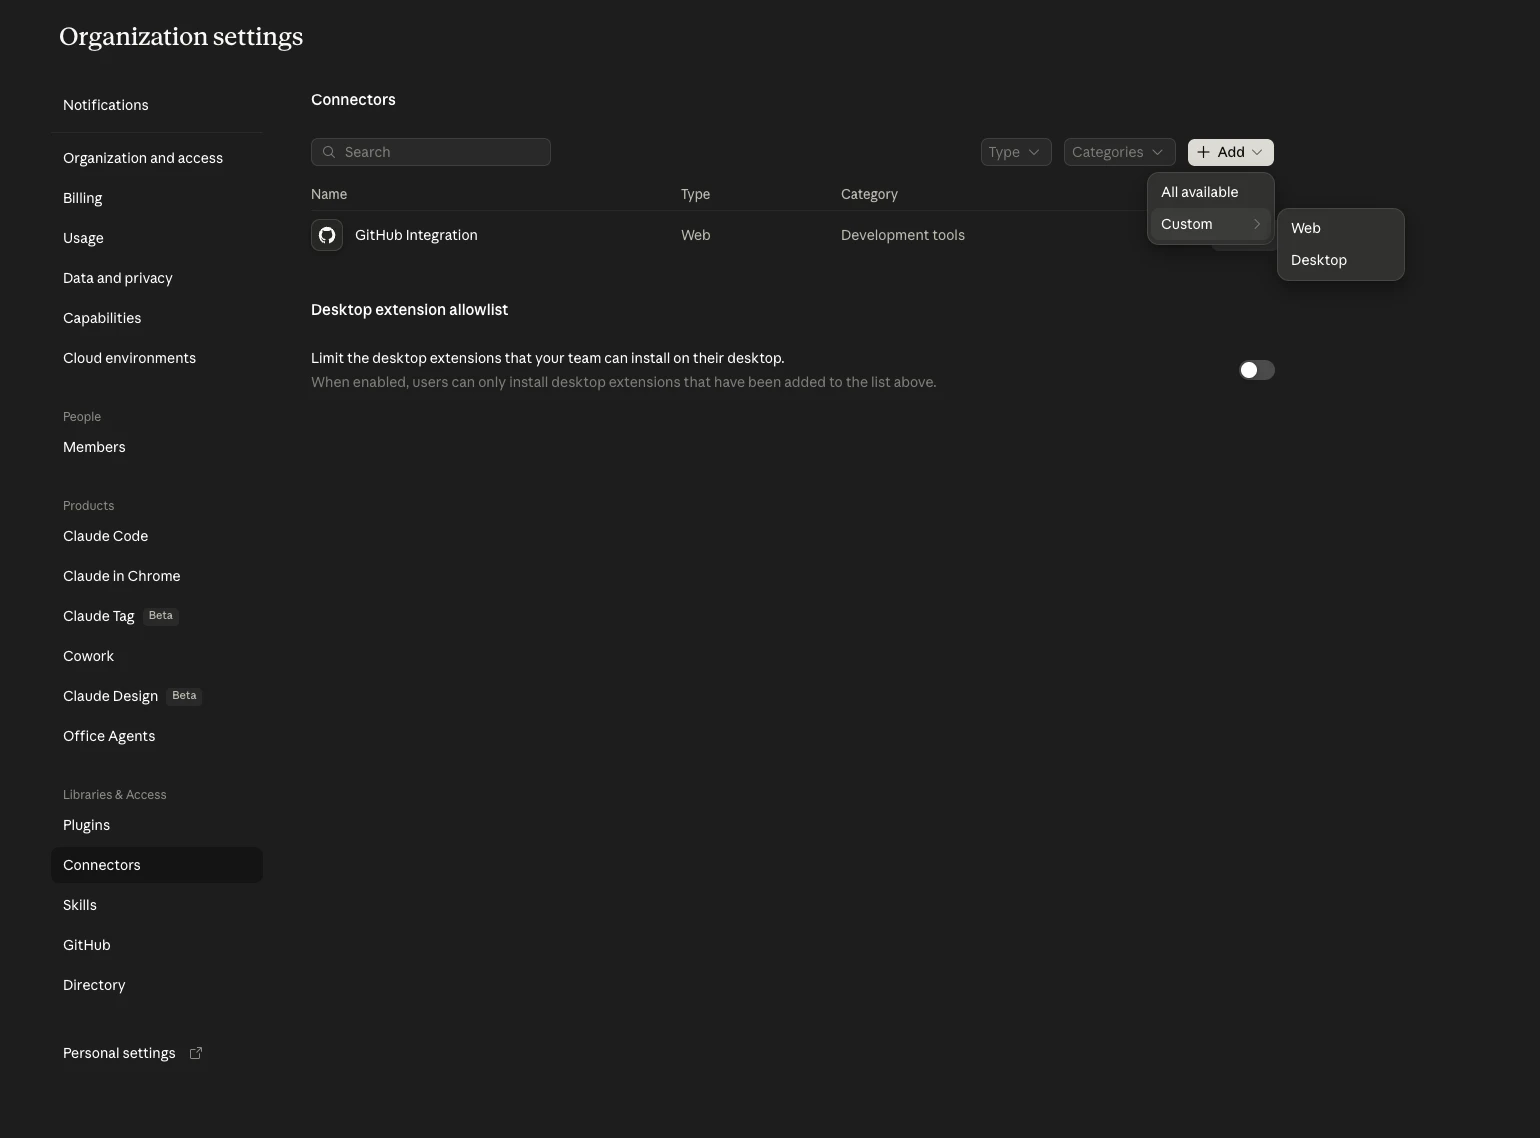
Organization connectors with the Add Custom Web menu -
Fill in the dialog and click Add:
-
Name:
Version Story Compare -
Remote MCP server URL:
https://mcp-compare.versionstory.com/mcp -
Leave the Advanced settings fields (OAuth Client ID and Secret) empty.
-
Under Connection methods, leave Individual sign-in on. Each member signs in to their own Version Story account, so redlines land in the right person's projects.
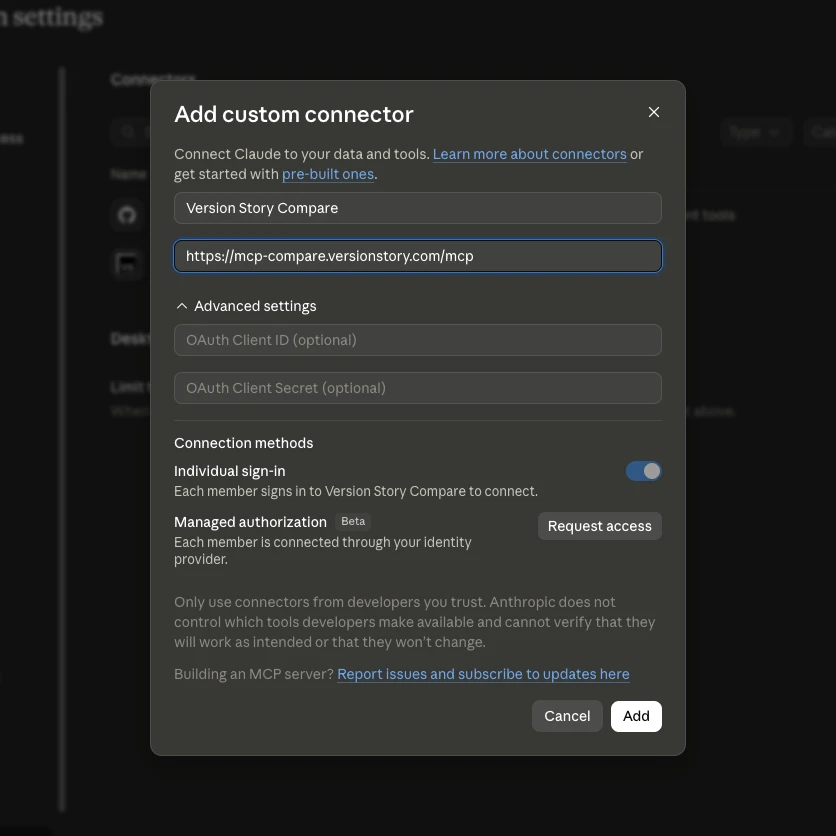
Organization Add custom connector dialog filled in -
Allow network access
-
Open Capabilities in Organization settings and turn on Allow network egress (under Code execution).
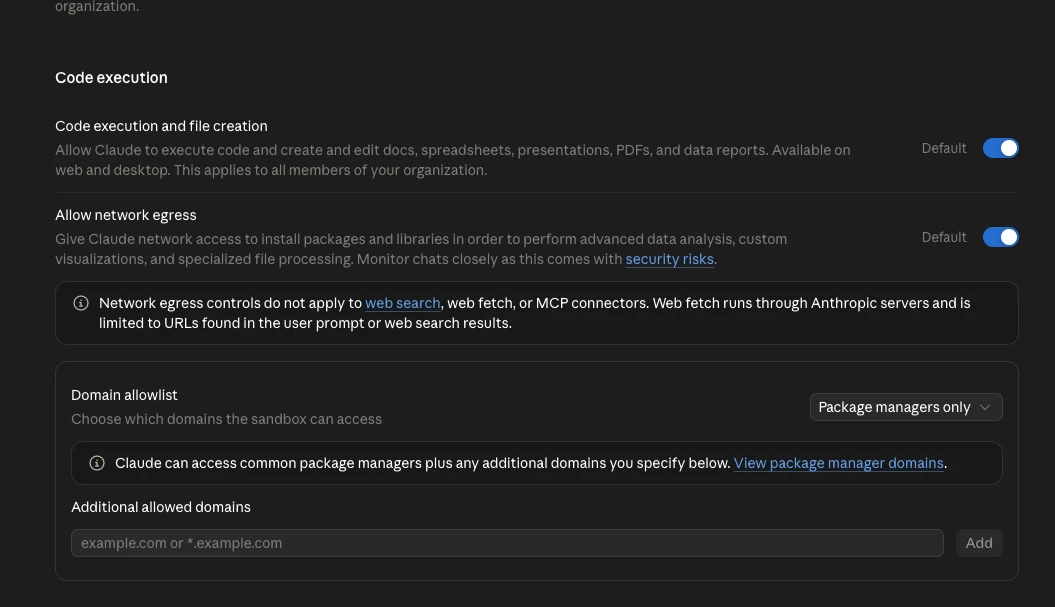
Organization Capabilities with network egress enabled -
Add the following domains, one at a time, to the Additional allowed domains field:
*.versionstory.com*.amazonaws.comThese let the connector send your documents to Version Story and retrieve the finished redlines.
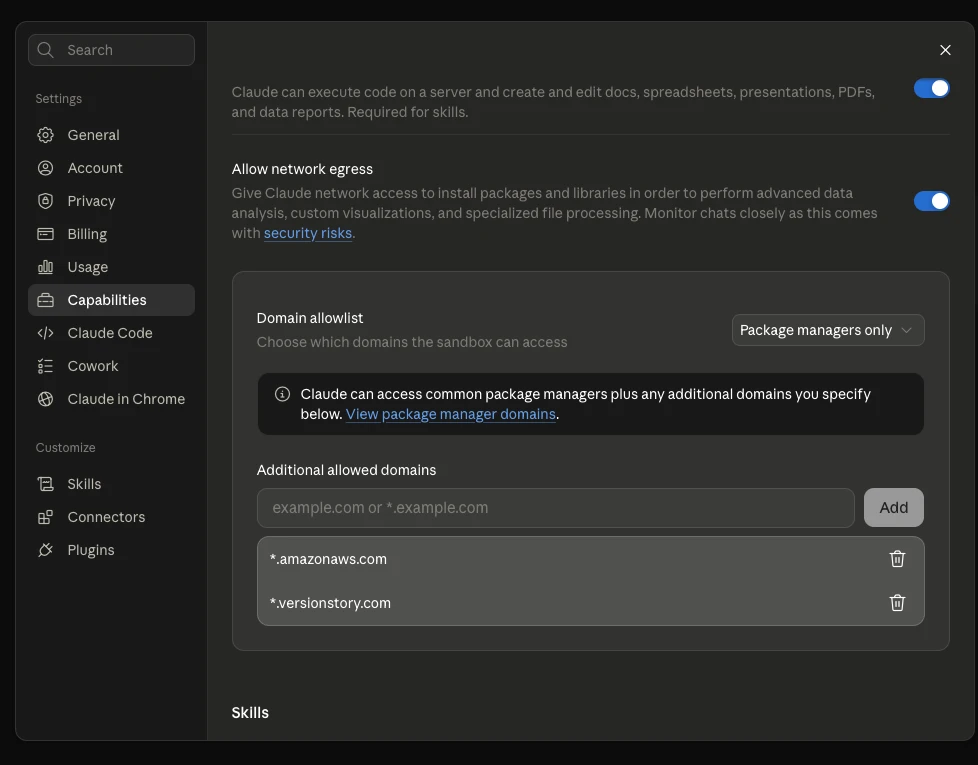
Additional allowed domains with both entries added
Allow members to approve the tools
-
Open Cowork in Organization settings and, under Permissions, turn on both:
- Allow "Skip all approvals" mode
- Allow "Always allow" for connector tools
- Without the second one, members cannot set the Version Story Compare write tools to Always allow, and Claude will stop mid-workflow to ask permission for each comparison.
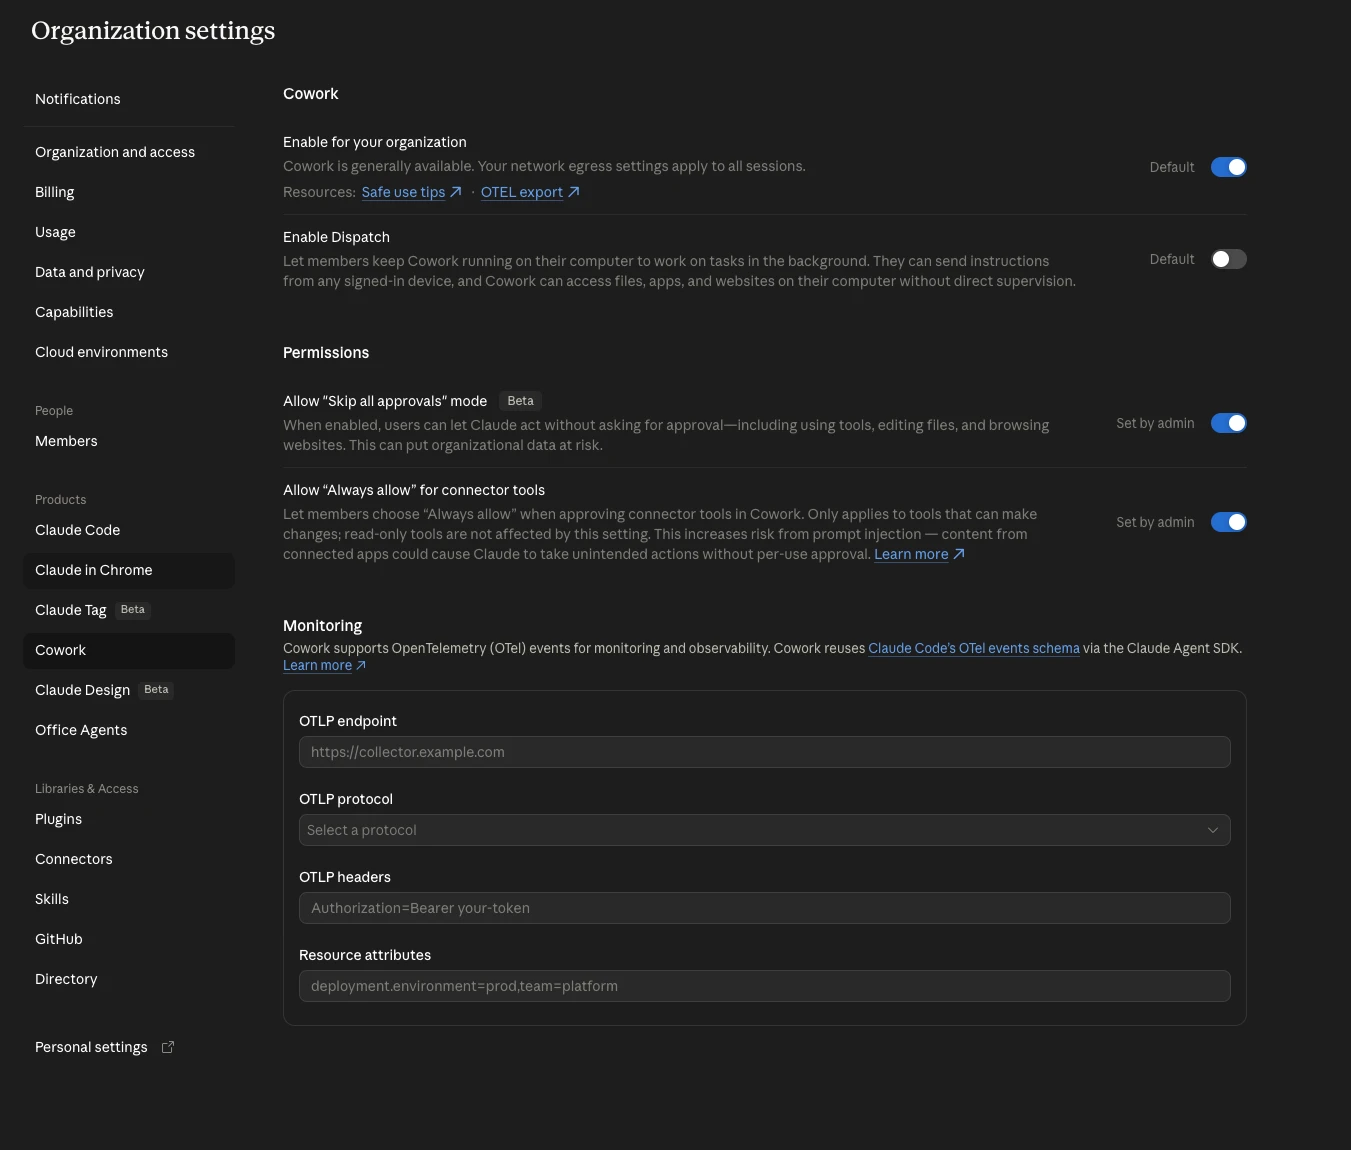
Cowork permissions with both settings enabled
For each member
-
Open Settings → Connectors. Version Story Compare is already listed. Click Connect.
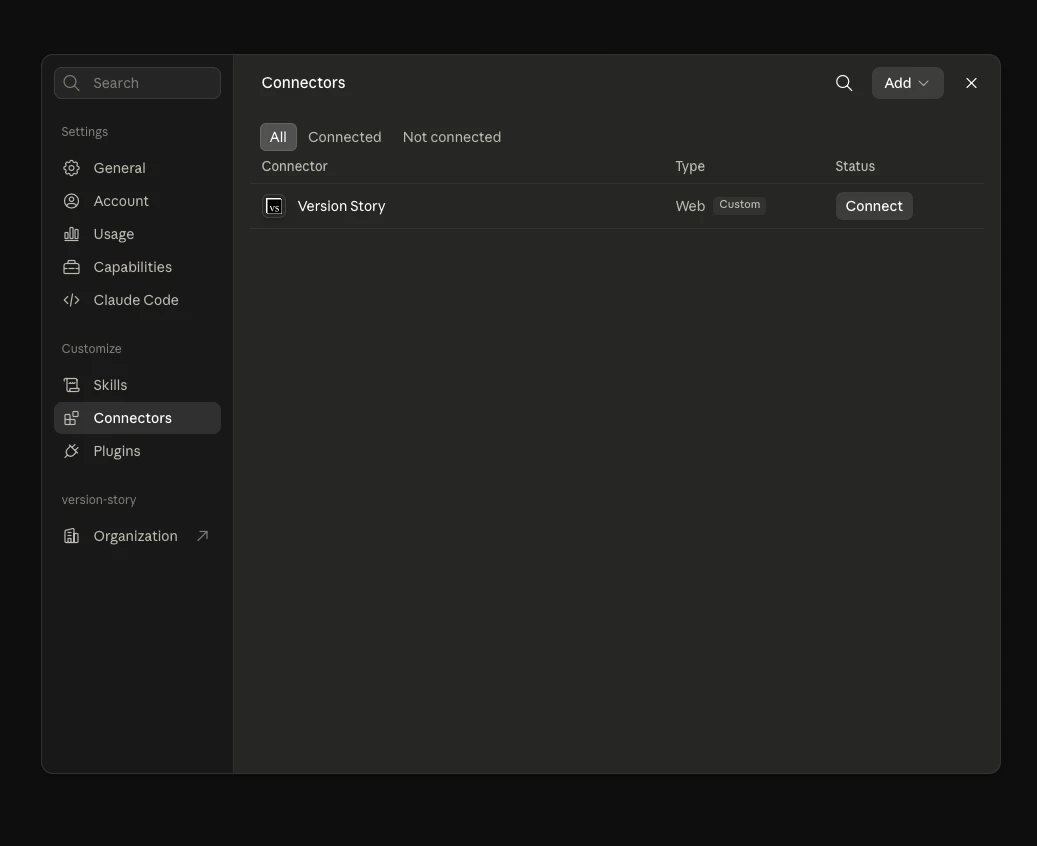
Connectors list with Version Story Compare and the Connect button -
Sign in to Version Story if you are not already authenticated, then click Authorize. You will be redirected back to Claude.
-
Click the Version Story Compare connector to open it.
-
Set both tool groups — Read-only tools and Write/delete tools — to Always allow.
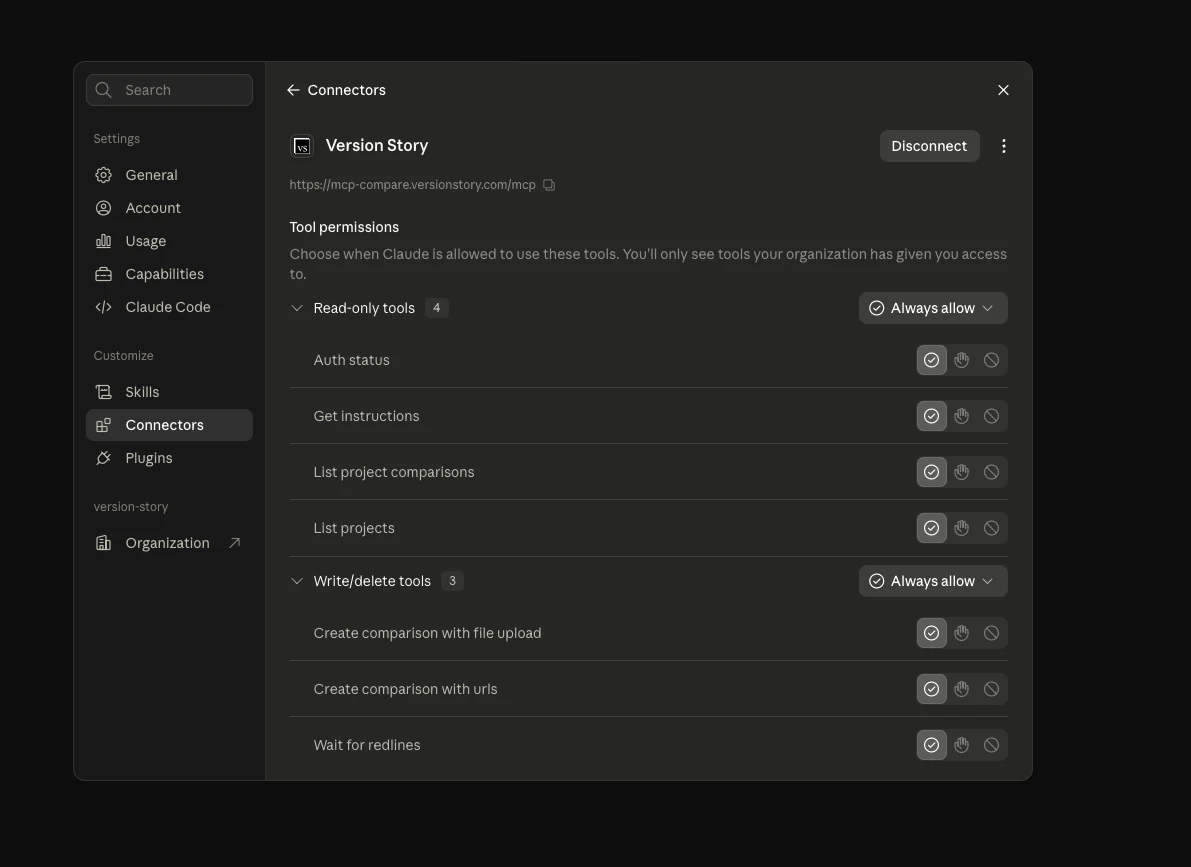
Tool permissions with both groups set to Always allow
Set up on a personal account
Add the connector
-
In Claude, open Settings → Connectors (under the Customize section).
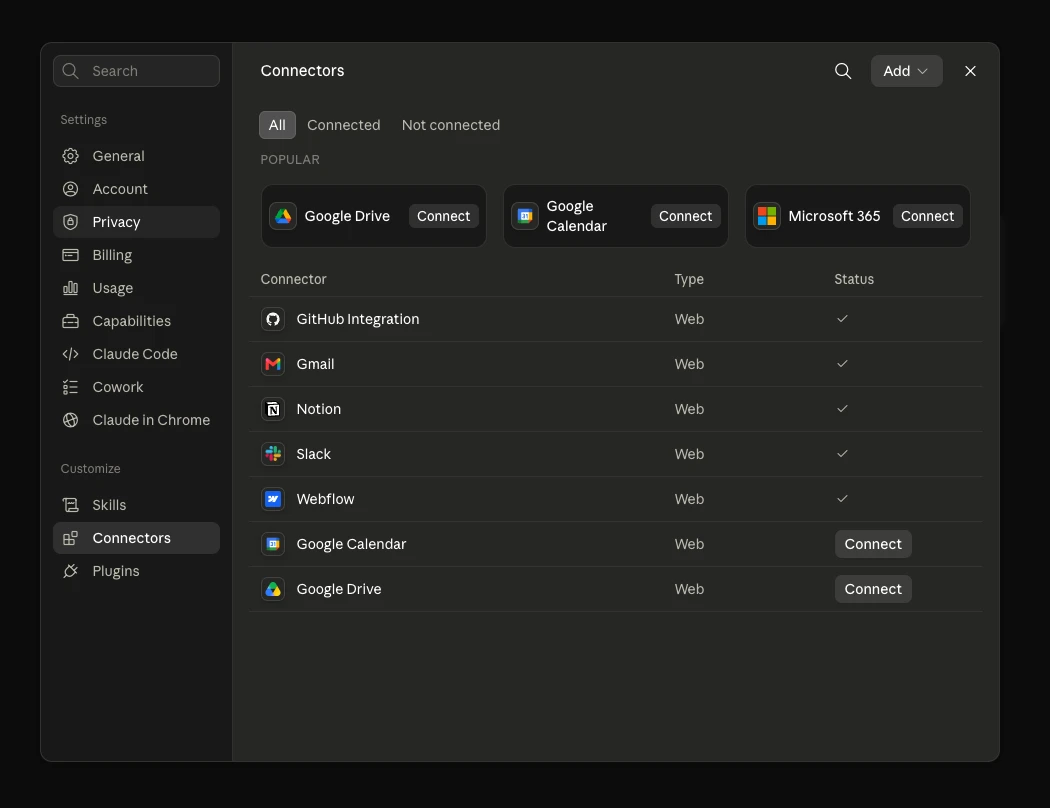
Connectors settings screen -
Click Add → Add custom connector.
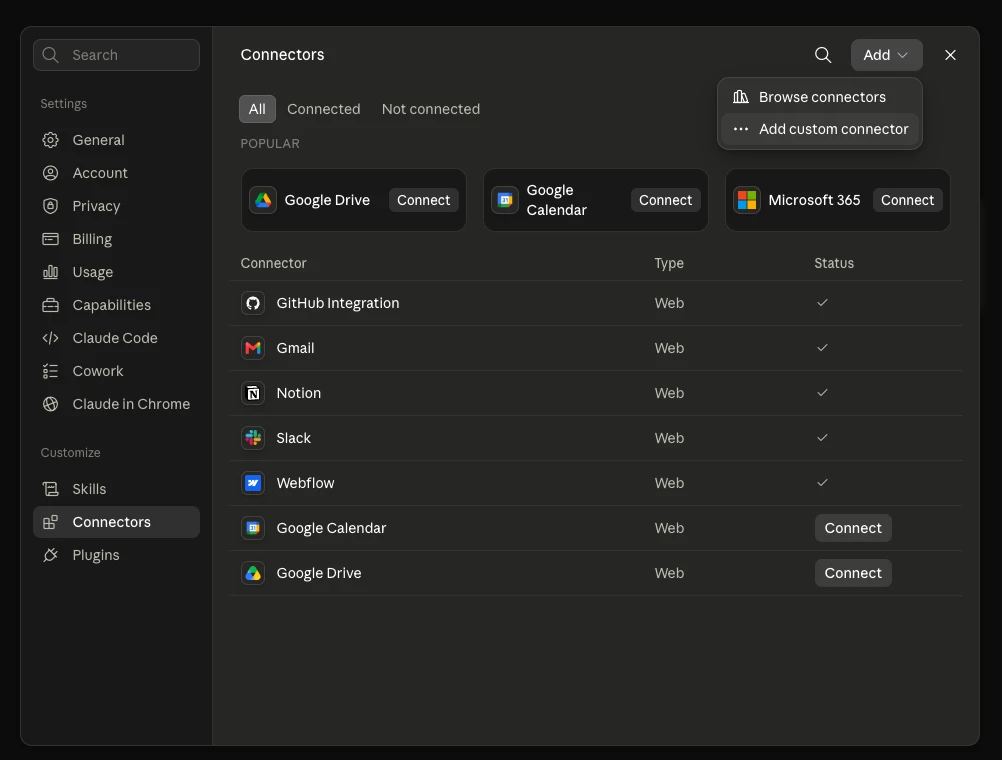
Add menu with Add custom connector highlighted -
Fill in the dialog and click Add:
-
Name:
Version Story Compare -
Remote MCP server URL:
https://mcp-compare.versionstory.com/mcp -
Leave the Advanced settings fields (OAuth Client ID and Secret) empty.
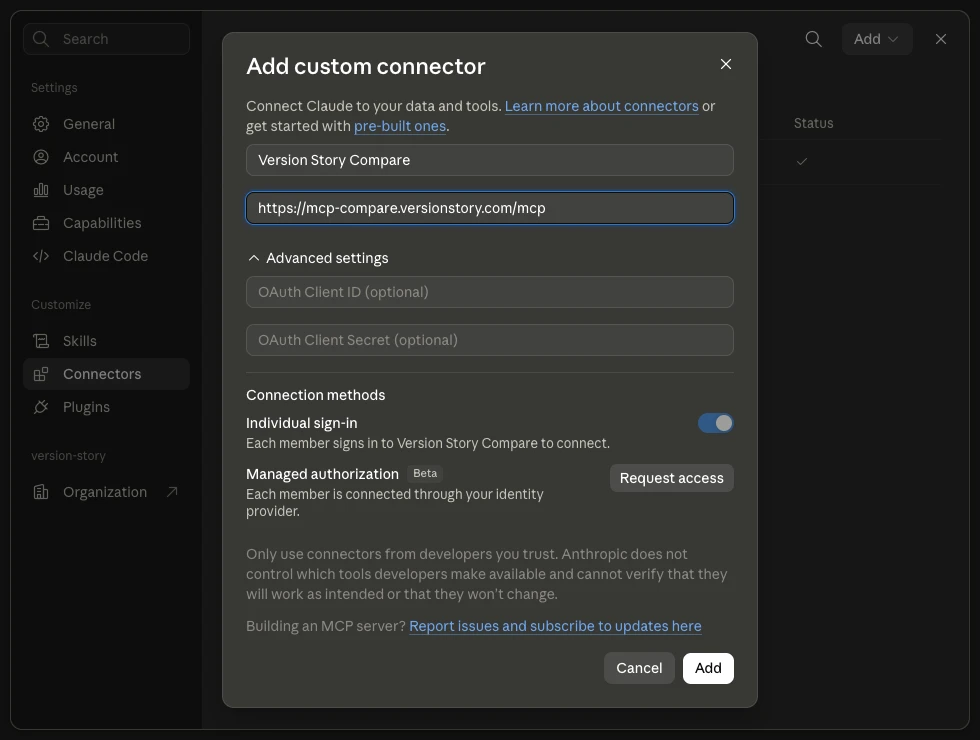
Add custom connector dialog filled in -
Connect your Version Story account
-
The Version Story Compare connector page opens and says you are not connected yet. Click Connect.
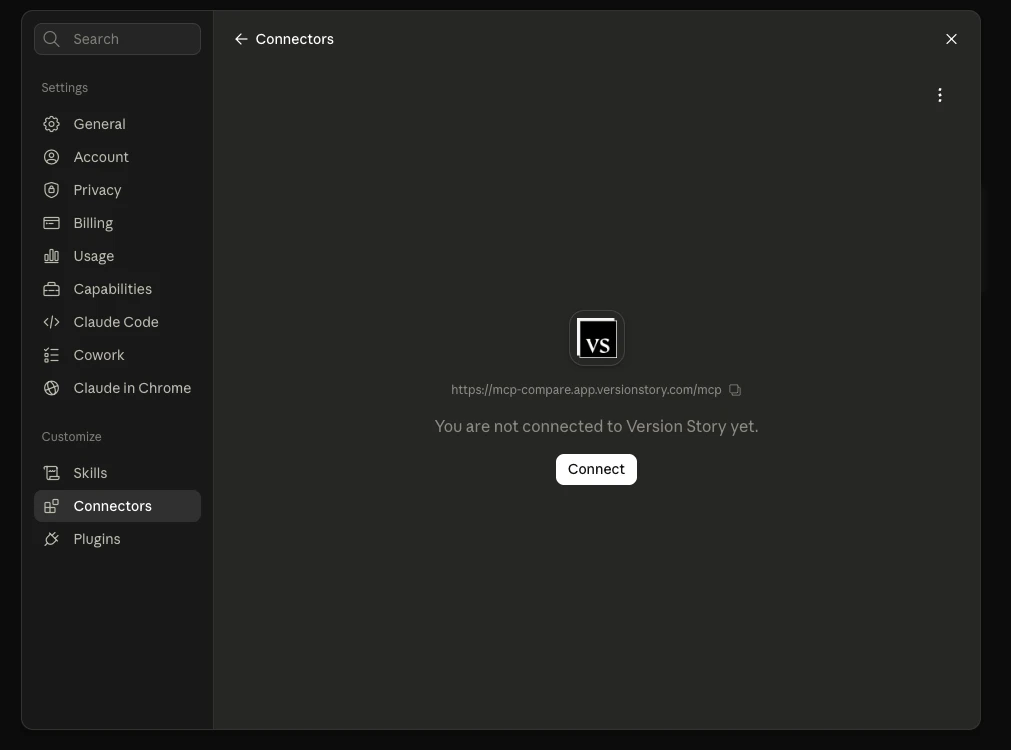
Connector page with the Connect button -
Sign in to Version Story if you are not already authenticated, then click Authorize. You will be redirected back to Claude.
Allow all tool permissions
-
Back on the Version Story Compare connector page, set both tool groups — Read-only tools and Write/delete tools — to Always allow using the dropdown to the right of each group heading.
- The default leaves the comparison tools on Needs approval, which stops Claude mid-workflow to ask permission for each one. Always allow lets Claude run a complete comparison start to finish.
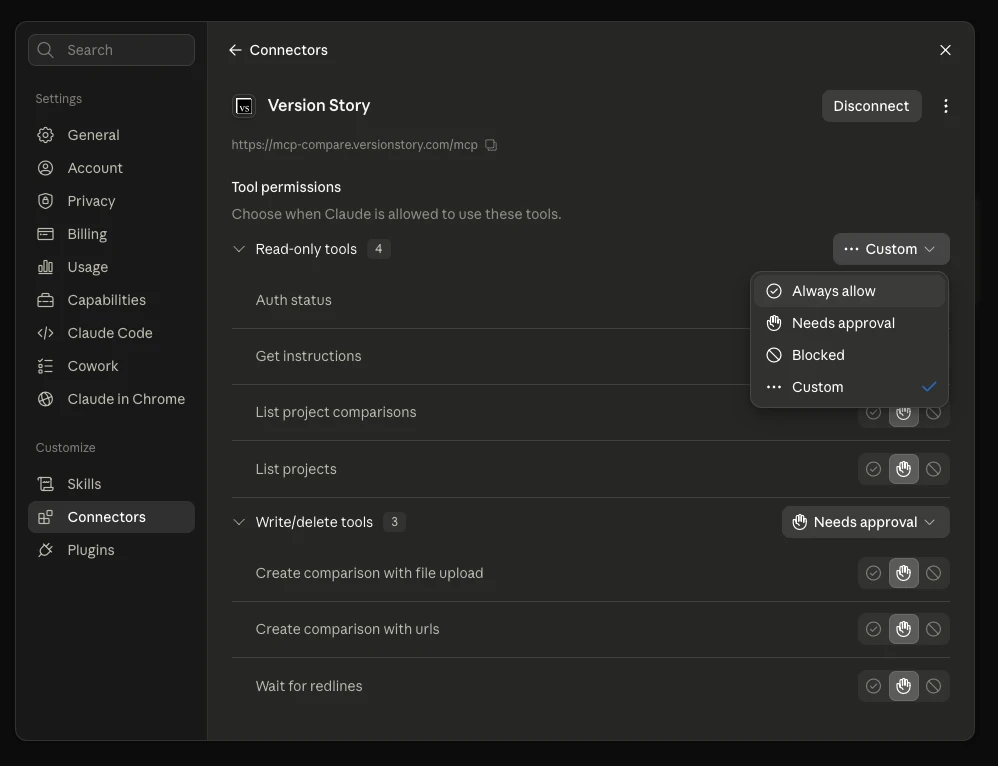
Tool permissions dropdown with Always allow
Allow network access
-
Open Settings → Capabilities and turn on Allow network egress (under Code execution and file creation).
-
Add the following domains, one at a time, to the Additional allowed domains field:
*.versionstory.com*.amazonaws.comThese let the connector send your documents to Version Story and retrieve the finished redlines.
Capabilities screen with network egress enabled and both domains added
Finish up
Whichever path you took, finish with these two steps.
Update your system prompt
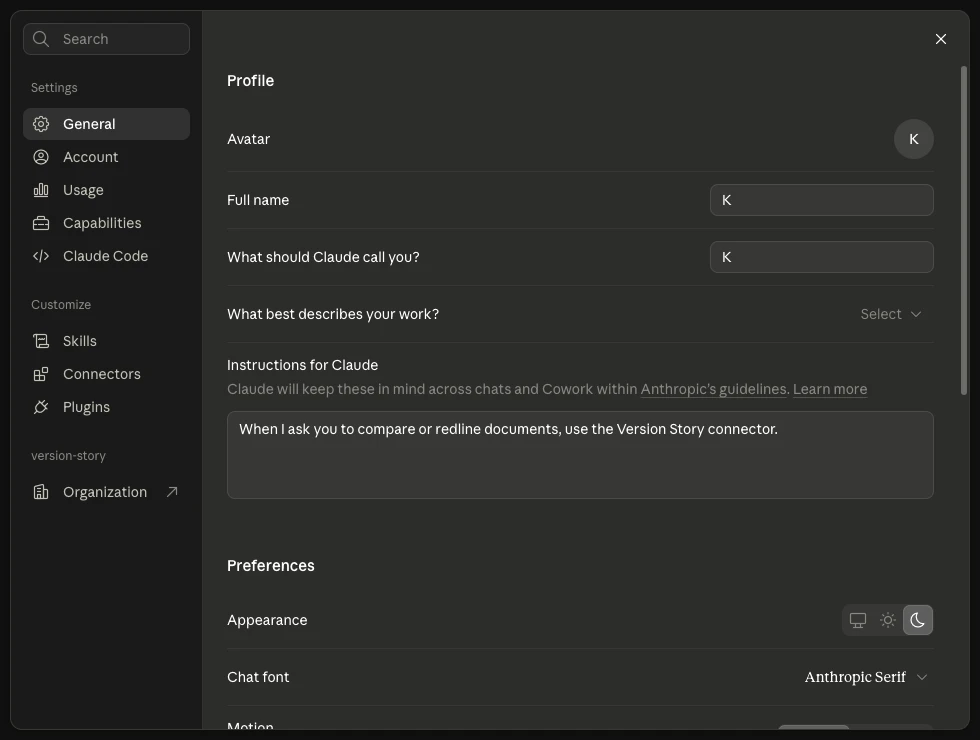
Under General → Instructions for Claude, add the following line:
When I ask you to compare or redline documents, use the Version Story Compare connector.
This tells Claude to reach for the connector on its own whenever you ask for a comparison, so you never have to name it in a prompt. Your settings should look like this:
Test it
Start a new Claude session (Cowork works great), attach two versions of a document — or point Claude at versions in your folder — and ask Claude to redline them using Version Story Compare. Claude will return an interactive redline link and the redline file itself, previewed right in the conversation.